Chilaquiles, Breakfast of Champions

Produce in Sunshine 2

This antecedent to the nacho originated in Mexico and has probably been made in one shape or another for hundreds of years.  The earliest recipe to appear in the US dates back to 1898, no doubt they were enjoying chilaquiles long before that.  This dish was the perfect foil for stale corn tortillas.  They were cut up into strips and fried, simmered in a chile sauce until the texture was al dente-ish, and then topped with such things as crema, queso fresco, cilantro, avocado and onions.  Regional variations abound from the type of chile sauce, to the end texture of the tortillas, to the garnishes used.  For example, in parts of Central Mexico, the chile sauce is poured over the tops of crisped tortillas just before serving.  At the other end of the spectrum, in Guadalajara, the tortillas are simmered in the sauce until the pretty much disintegrate making for more of a thick soup.  In most occasions, I was offered versions in red and green sauce.  However, in some areas of Northwestern Mexico it is quite common to have your chilaquiles topped with a white sauce.

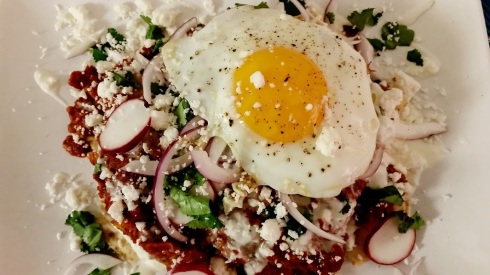
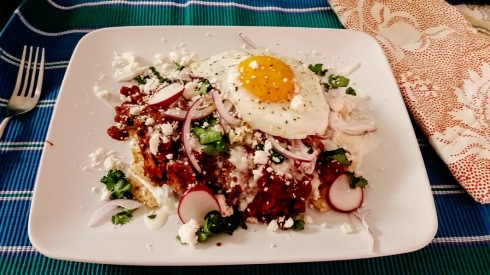
Chiliaquiles with Fried Egg 2

This is Chilaquiles – a nice bridge between the warmth of summer and the cooler days of fall.  It is a full flavored, spicy, mid-weight dish.  It also happens to be colorful and fresh.  It is also pretty much awesome every other time of year as well.

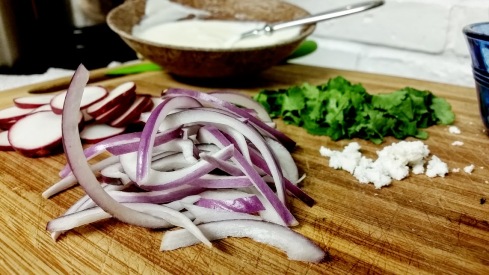
The Garnishes

My first experience with this iconic dish was in Jaltenango de la Paz, a small town in the southwestern part of Chiapas.  It was a simmered in a red sauce garnishes included sliced radishes and arrachera (flank steak), as well as the usual suspects.  I particularly liked the queso, very fresh and delicate cheese.  I’ll admit that given all of the hype leading up to this, the chilaquiles were kind of underwhelming – soggy, saucy tortilla strips.  I realize now that that was intentional and is quite common, if not a defining characteristic of the dish.  I craved a bit of crunch.  The chile sauce had some heat, but was sort of one dimensional.  I don’t know.  In hindsight, I want to say that I was too hard on it, but whatever.  I had another version at the hotel in San Cristobal.  The tortillas were a bit crisper, which I preferred.  No radishes or arrachera, but it did have avocado and chorizo.   It was good, but my expectations were lower this time around, as well.  It came from the hotel after all, not that there’s anything wrong with that.

I still felt I was missing out on the experience I was promised.  Or perhaps the appeal was just lost on me.

Farm Visit - Triunfo 2

Chiapas, Mexico

In Mexico City, at the airport of all places, I gave it third try.  The flank steak was really nicely cooked and flavorful.  The tortillas were crisper yet still coated with chile sauce.  The toppings were really nice.  I could eat it with a fork or still with my hands.  I really liked it.  So maybe there was something to this chilaquiles thing after all.

Now to make my own!  I didn’t want to go the stale tortilla route.  I wanted some crisp action and but also some of the simmer action.  So *gasp* I used tortilla chips.  Sauce-wise, I went red.  I definitely needed crema, cilantro, and queso fresco.  I also liked the fresh radishes and red onion.  So there.

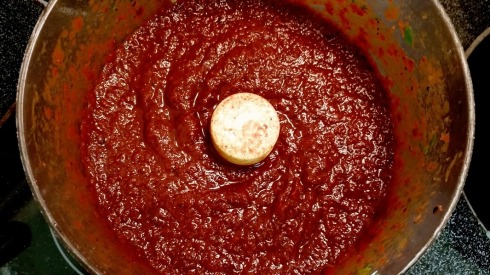
Before BlendingChili SauceSimmering the Sauce

I’m not laying any claims to this being the most authentic version of chilaquiles ever.  It takes what I experienced in Mexico and alters it to my preferences.  I’m sure versions like mine exist out in the world and if I were to have had one of those, it would have totally lived up to the hype.

Chilaquiles

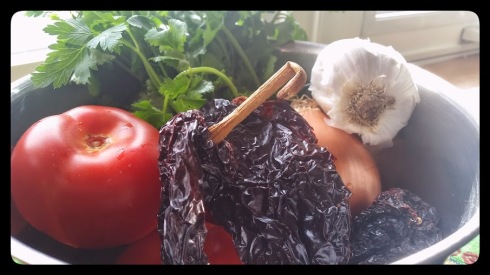
4 Dried Ancho Chiles (Or 2 Ancho and 2 Guajillo Chiles)

3 Cloves Garlic

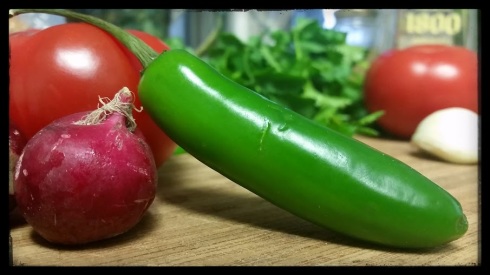
2 Fresh Serrano Chiles, stemmed and seeded

28 oz Tomatoes, quartered with juices (Canned are fine)

1 Medium Yellow Onion

1/2 a Bunch of Fresh Cilantro, tough stems removed and roughly chopped (about 1 cup loosely packed)

1 Tbls Salt, Kosher

1/4 Cup Cooking Oil (I used Peanut Oil)

1 tsp Sugar

Tortilla Chips

Plus garnishes:

Chopped Cilantro

Sliced Radish

Crema (Or Creme Fraiche or lightly thinned Sour Cream)

Queso Fresco

Sliced Red Onion

Avocado

Chorizo

Egg

Etc.

Jalapeno and Radish

First stem and seed the dried chiles saving 2 teaspoons of the seeds.  Then slice the chiles in half lengthwise.  (You’re going to need some boiling water here in a minute, about four cups worth.)  Heat a cast iron skillet over medium.  When it is hot, add the chiles, a few pieces at a time, pressing them flat onto the pan until aromatic then flip and repeat.  About 20 seconds or so per side.   Transfer the chiles to a bowl and pour boiling water over them to cover.  Let steep for at least 15 minutes.  While they are steeping, toast the reserved seeds in a dry pan until very dark, but not quite burnt.

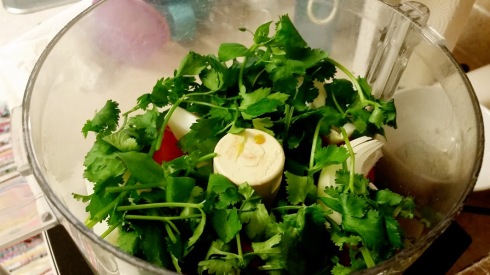
In the bowl of your food processor, add the garlic, serrano chiles, tomatoes, onion, cilantro, salt, toasted chile seeds, and a 1/2 cup of the chile soaking water. Puree until smooth adding additional soaking liquid if it seems dry.  Press the puree through a medium coarse mesh sieve into a bowl.

In a pot with deep sides, heat the oil over medium until it shimmers.  Put on an apron and prepare to make a mess.  Add the puree to the pan.  Reduce it down, stirring frequently until it is thickened.  About 10 minutes.  Add 2 cups of chile soaking liquid to the pot.  Reduce heat and simmer, partially covered, for 20 minutes.

Stir in a teaspoon of sugar and season with salt to taste.  Add the tortilla chips, gently stir to coat them with the sauce.  Simmer another few minutes.  Spoon the chips out onto a plate and garnish.

Chiliaquiles with Fried Egg


Roasted Fiddleheads

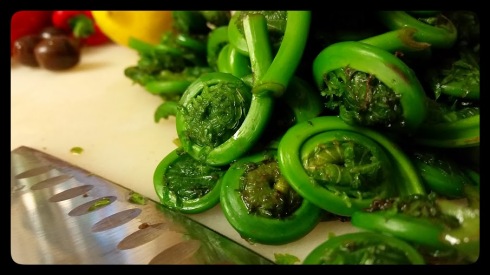
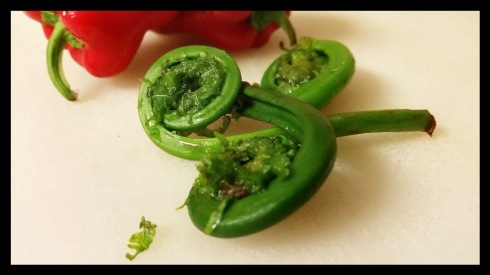
New Englanders are quite familiar with this unique produce.  However, I imagine that for most people, fiddleheads are some sort of alien vegetable.  We had never heard of them prior to arriving in Maine, but upon seeing a display of these dark green coils piled high at the farmers’ market, we were immediately intrigued and excited by this local delicacy.

Fiddleheads 2

The unfurled fronds of the ostrich fern are only available for a short time every spring: from about the end of April through the beginning of June.  These wild vegetables are harvested along the banks of rivers and streams when the fronds are between two and six inches off the ground and the fern is still tightly curled up like the scroll of a fiddle.

You know it’s spring when you see the fiddleheads.

Fiddleheads 1

This year we tried out a couple of new preparations.  Here is a quick and easy one.

Roasted Fiddleheads!

1 pound, or so, Fiddleheads

1/4 cup Extra-Virgin Olive Oil

2 medium Red Bell Peppers

Zest of 1 Lemon

3 Cloves Garlic, sliced

1/2 Cup Black Olives, sliced

Salt and Pepper to taste

First things first, clean the fiddleheads by removing any brown colored or woody stem ends.  If there is any of the papery brown chaff stuck on, you’ll want to remove that as well.  Most often that has already been removed.  Then rinse the ferns well in 2-3 changes of water.  Bring a large pot of salted water to a boil and blanch the fiddleheads for about 3 minutes.  Place in an ice bath until cool.  Strain them out and pat dry.

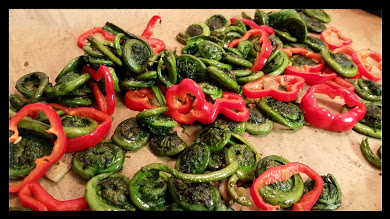
Preheat oven to 500F degrees.  Put the fiddleheads in a bowl with the olive oil, bell peppers, garlic, salt, and pepper; toss well.  Line a sheet pan with parchment paper and add the fiddlehead mixture.  Roast for 6-8 minutes stirring once halfway through, they should be cooked thoroughly, but not mushy.

Roasted Fiddleheads and Peppers

Transfer the roasted vegetables to a serving bowl.  Toss with the lemon zest and black olives.  Finish with a sprinkling of flaked sea salt and a lemon wedge.

Roasted Fiddleheads 1


The Connemara Spirit

Spirit.  Sugar.  Bitters.

Players

The building blocks of the classic cocktail.

This month’s Mixology Monday hosted by Sass & Gin is a back to basics with a twist.  We start with the venerable Old Fashioned.  Perhaps the drink that most defines or even originates the concept of a cocktail.  My preferred version is made with 1 sugar cube muddled with 2 dashes Angostura, 1 dash Orange Bitters, and a barspoon of water.  Then firmly press in a large orange peel and pour in 2.5 ounces of Rye.  Add a large sphere or cube of ice and stir until well chilled.

Orange Peels

Sass & Gin has tasked us to take that classic and push it outside the box.

Here it goes.

Poitin

Since we are all feeling a little Irish this time of year, I thought it fitting to offer up an old fashioned cocktail with one of the world’s oldest spirits: Poitin (say potcheen) derived from the Gaelic word for little pots, as in pot-stills.  Early records apparently report distilling in Ireland way back in the year 584 by Irish monks.  Traditionally made with malted barely, potatoes, and sugar beets, poitin is typically an un-aged Irish moonshine.  It was “outlawed” (or prohibitively taxed) in 1661 by King Charles forcing distillers to ply their craft in hiding, evading the excise men, for the next several hundred years.  So, in a way, you could say that Poitin is the spirited distillate of Irish independence.

The Glendalough mountain-strength Poitin I’m using is rather intense.  It’s got some burn, but it also has a pleasant woody quality with a grape-like fruitiness, maybe a bit of green apple peels and a touch of lime.  A pinch of spice, clove?  My first attempts at this drink used straight-up, mountain-strength.  And well, it was too much…too much to achieve proper balance that is.  So, I backed it off and ‘gasp,’ diluted it a bit.  In the future, I will purchase either the regular strength or the sherry cask finished version rather than the mountain.

Honey

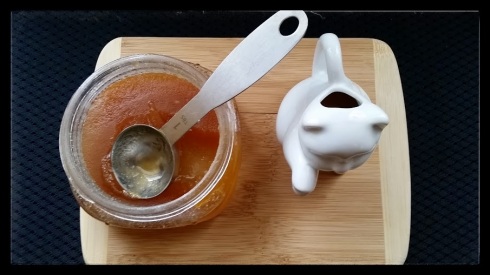
Now for the sugar.  I tried a bunch of options.  Molasses was overbearing.  Maple didn’t jive.  Simple syrup was too simple.  Demerara syrup could work.  However, it was a 1:1 honey syrup made with a fall honey that we got from a friend that made it sing.  During the fall, the bees feast on the aster flowers and the resulting honey has a vivacious floral, herbal aroma along with a deep amber color and a heavier flavor than that of, say a spring honey.

Expell the Oils

Bitters…  I really wanted this drink to have some exotic bitters in it, but in the end, I liked the Angostura and Orange bitters best.

Here you have it:

Stir

The Connemara Te (pronounced tay)

1.5 oz Poitin, Mountain-Strength

.5 oz Cold Water

.5 tsp Honey Syrup

2 dashes Angostura Bitters

1 dash Orange Bitters

4 drops Orange Blossom Water

Orange Peel

Ice

Combine the honey syrup, bitters, and orange peel in the bottom of an old fashioned glass.  Use a muddler to press out the citrus oils.  Add the water and give it a swirl or two with the muddler.  Then add the poitin, the orange blossom water, and ice.  Stir with a barspoon until well chilled.

Note:  I suspect that if I were to use a lesser proof of poitin, I would find this drink quite agreeable using 2oz of spirit and only a barspoon of water.  However, I’ll have to confirm that some other time.

Other Note: Connemara Te is a reference to the song The Hills of Connemara, which is about Irish moonshiners.  In the song they refer to the ‘shine as mountain te.  ‘Te’ is the gaelic word for tea.

To see a round-up of all the great contributions to this month’s Mixology Monday click here.

Connemara Te

Happy Saint Patty’s Day!


Garlic Aïoli

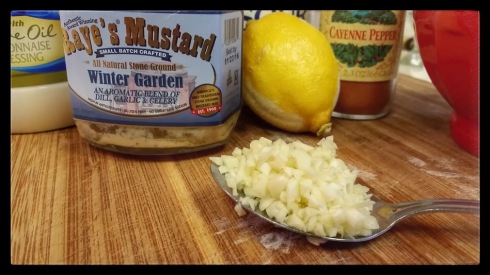
The Set Up

Now, one could totally take the high road here, and make an emulsified oil spread from scratch.  I’m sure it would only push this aïoli a couple of notches more awesome, however, I didn’t do that here.  When I buy mayo at the grocery, I can somehow and willingly, I might add, disassociate myself from the truth that this whitey-white condiment is largely just a lot of whipped fat oil.  But it also has an uncanny way of making a turkey sandwich sing, not to mention a BLT.

But that’s not where mayo really shines.  When it’s dressed up with garlic and lemon juice and renamed aïoli, it gains a certain bit of class.  Some zip, intensity and complexity.  It enters a new domain.  It becomes more that just oil.  And it tastes soooo good.

Garlic Aïoli

1/2 Cup Mayonnaise

1/2 Cup Sour Cream

1/2 Tsp Mustard (stone ground or dijon)

2 Tbsp Lemon Juice

Dash of Cayenne

3-4 Cloves Garlic, minced

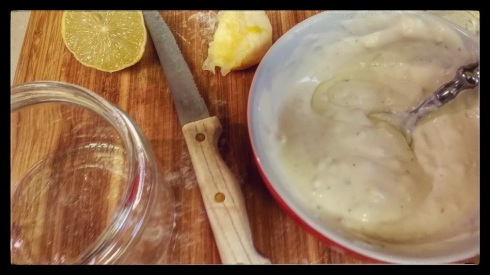
Combine all ingredients in a bowl.  Season with salt and black pepper to taste.  Cover with plastic wrap and refrigerate for at least 30 minutes.  This keeps quite well and pretty much makes everything better including the Tortilla Española.

Aioli


Tortilla Española

Spanish Tortilla 1

I was introduced to Tortilla Española via my friend Jose on a drizzly, yet warm early spring day in Clermont-Ferrand. He had invited a mutual friend and I to his tiny one room flat for tapas.  I can’t remember exactly where in Spain he was from, but I’m pretty sure it was in the southern part.

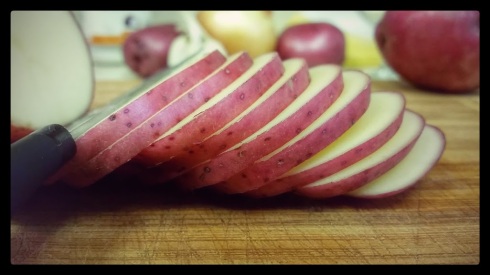
Potatoes 1

Onions

When we arrived, he had already prepared a marinated tomato and onion salad with olives and tuna.  While we helped ourselves to the salad and some Kronenbourg 1664, Jose fried slices of potato and onion in a pan of bubbling olive oil.  After straining them out, he stirred in beaten eggs, and sprinkled in a bit of dried yeast.  All that, was then cooked into one big omelette-like, potato cake.  I’m not sure what role the yeast could have possibly played.  He didn’t think it did anything, but his grandmother had always added yeast, so he kept doing it.  I’ve since omitted it, and since my grandmother never made this, I can do that.

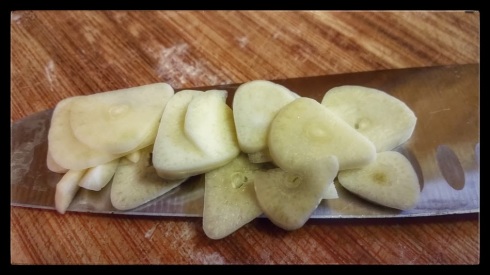
Garlic

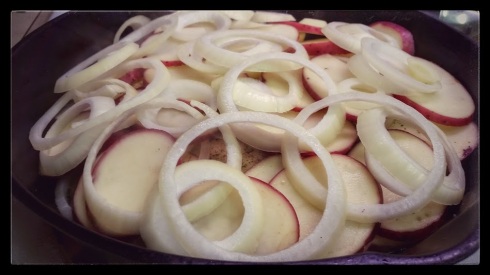
Potatoes and Onions

Anyhow, it was awesome.  When I got back to the states a couple of months later, it was one of the first things I made, along with the salad.  In total, I probably ended up making the salad more often, but I hadn’t made either dish for at least a couple of years.  Until last weekend, that is.  I have rediscovered the Spanish Tortilla and it is still awesome.

Cooking

Tortilla Española

1 Cup Olive Oil

1.5 lbs Red or Gold Potatoes, rinsed and thinly sliced

1 Onion, sliced thin

6 Eggs

1 Tbsp Garlic, Sliced

Salt and Black Pepper

Heat the oil in a large skillet over medium.  After about 3 minutes, test the oil with a slice of potato, if it bubbles right away, then its ready to go.  If not wait until the bubbles start to happen.

Testing the Oil

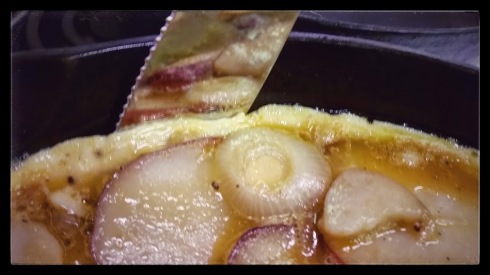
Add the potato, onion and garlic slices to the hot oil.  Season with salt and pepper.  Gently stir the mixture around in the pan as it cooks and adjust the heat to maintain moderate bubble action.  We’re not aiming for browning at this point, just a little tenderness.  About 15 minutes, give or take.  Remove the potatoes-onions-garlic from the oil with a slotted spoon and allow to drain and cool slightly in a colander, or simply lay them out on a paper towel lined baking sheet.  Strain out the excess oil and set it aside.  Hang onto the skillet, you’re going to use it again in a minute.

Beat the eggs in a large bowl seasoning with salt and pepper.  Add the potato mixture and stir/fold gently to combine.

Put the skillet back on the burner over medium heat.  Add 2 Tbsp of that reserved oil to the pan.  When the oil shimmers, add the eggy potatoes spreading them around in the pan to form an even-ish layer.  A minute or two later, reduce the heat to medium-low and cook for 5 minutes.  Just leave it be for 5 minutes.

Releasing the Sides

Okay, run a knife or something along the edge of the pan to loosen up the tortilla.

It gets a bit tricky here.  Slide the potato cake out onto a plate.  The top of the tortilla is going to still be runny and its okay.  Place another plate on top of it and invert.  Add another Tbsp of oil to the pan.  Save the rest of the reserved oil for another use.  Now, nudge the tortilla back into the pan.  Cook for 5 minutes.

Slide it out onto a serving plate and let it cool a bit.  Serve warm or at room temperature.  This doesn’t really refrigerate well.

Jose served his tortilla with a garlic aïoli and I totally recommend this.  Click here for a recipe.  Dust with a little paprika and enjoy.

Spanish Tortilla 3

Spanish Tortilla 2


Surviving the Blizzard…

Blizzard 2015 a

(PS – A week later, the snow completely covers the patio furniture and is up to the window.)

(PSS – Three weeks later, my back has about had enough of the daily shoveling.  The driveway get longer and longer.  I’m pretty sure it stretches for at least 3 blocks, now.  Running out of places to put the snow…)

(PSSS – Six weeks later, the snow is still there.  Why, yes, I do think I’ll have another Toddy.  We’ve probably added at least another foot or two.  However, spring is just around the corner.  I can feel it in the air.  We had some melting yesterday: our first 40F degree day since mid-December.  Although, last night dropped below zero again, I think hope the deep freeze temperatures are mostly behind us.)

Warming

A Winter Remedy

2 oz Whiskey

1/4 oz Lemon Juice

2 tsp Demerara Sugar

Boiling Water

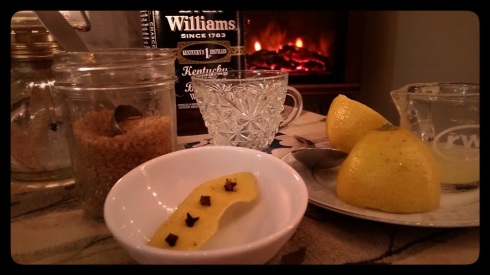
Lemon Peel studded with 4-6 Cloves

Add the sugar to a mug.  Fill half way with the boiling water.  Stir to dissolve the sugar.  Add the studded lemon peel garnish and stir it around a bit.  Next pour in the lemon juice and whiskey.  Stir a final time.  Enjoy.

Pour

Warding off the cold one toddy at a time.

Pour 2

Whiskey

Toddy

Simple and delicious.

Blizzard…What blizzard?


Blue In Green: MxMo XCIII

Blue like the January sky.

Blue ghosts cross a white field

Ice blossoms dance in cold sunlight

Blue is the memory of color.

Chilling the Coup

Anyhoo, Blue is the theme for this month’s Mixology Monday hosted by Ginhound!  The blue cocktail trend is supposed to become a thing, so this seems very a la mode.   I’m not really one to add food coloring to my drinks just in order to turn a perfectly good martini blue, or a beer green.  However, it is near impossible to walk a hard line on food coloring.  I’m pretty sure that Campari contributes a fair amount of it, as does Angostura and a host of other common occupants of my bar, for that matter.  But as for just adding a few drops of blue… well, that would be too easy anyway.

So, I originally set out thinking about how I could turn a drink blue more naturally.  (I also didn’t have any Blue Curacao or other blue liqueur.)  Ginhound had plenty of good ideas of using red cabbage, blueberries and the like, which could totally work, but I wasn’t feeling it.  Then I thought about ingredients that have blue in the name, then cocktails that have blue in the name…  But that’s when things got more interesting.  I started thinking about blue outside the food context and things/feelings associated with that color/word.  The challenge to create something around an abstract theme is exciting!

Enter Miles Davis

A smoky, blue lit club swirling sounds about the atmosphere.  Jazz always has had this hazy blue vibe to me.  Not all jazz recordings of course, but rather the general idea of it.

Miles Davis’ Kind of Blue is one of the greatest jazz albums of all time.

“Why does Kind of Blue possess such a mystique? Perhaps because this music never flaunts its genius…. It’s the pinnacle of modal jazz — tonality and solos build from the overall key, not chord changes, giving the music a subtly shifting quality….”  – AllMusic senior editor Stephen Erlewine

Let’s create a cocktail inspired by Kind of Blue!

Establishing 1

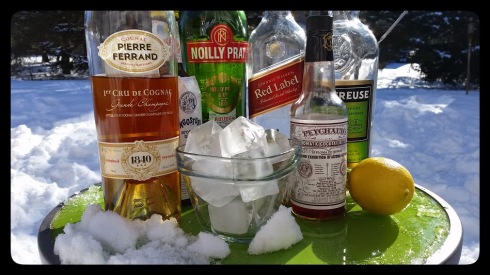
After listening to the record, I knew right away that the rounded sophistication of the sound called out for cognac.  Naturally, my thoughts turned to the Vieux Carré, hailing from the land of jazz with a solid base of cognac.  But I didn’t want to just make a classic cocktail.  I wanted something that spoke to the source material more specifically.

Lemon

The finer details of the drink, therefore, needed more boundaries.  So, I narrowed the album down to one track in particular, Blue in Green.  The soft piano and bass undertones would be played nicely by the cognac.  An accent of scotch for my smoky haze.  The brassy inflections that pop above those undertones add complexity and high notes to the sound and really make the music interesting.  Bitters and a twist of lemon.  A little sweet vermouth to echo the Vieux Carré, add mouth-feel and round it all out.

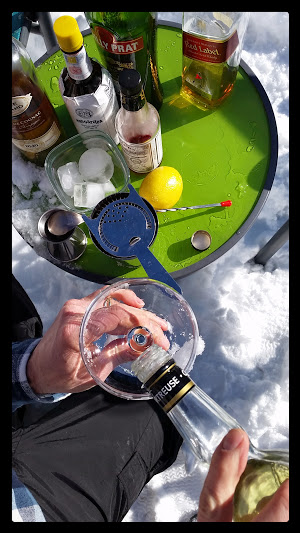
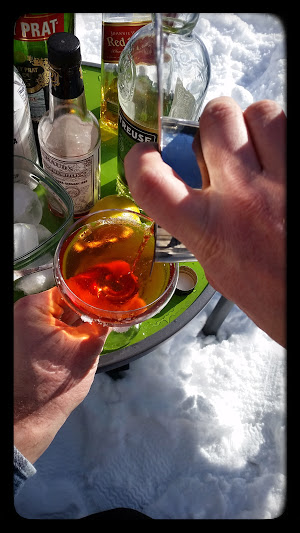
Let’s swirl some green chartreuse into a chilled coup for the improvisation and a subtle shout out to another New Orleans classic.  Then, we’ll pour our Blue into the Green!

Chartreuse

The Stir

The Pour

From Above

Blue in Green

1 oz  Cognac

1 oz  Scotch

1/2 oz  Sweet Vermouth

2 Dashes  Angostura Bitters

2 Dashes  Peychaud Bitters

2 Dashes  Orange Bitters (Fee Bros.)

1 Bar Spoon Green Chartreuse

Lemon Peel for Garnish

Set a cocktail glass to chill.  Combine the first 6 ingredients in a mixing glass/tin.  Add ice and stir.

In the chilled glass, add a bar spoonful of green chartreuse and swirl it around the glass.

Strain the contents of the mixing glass into the coup, twist the lemon peel over the drink to release the oils and garnish.
Profile

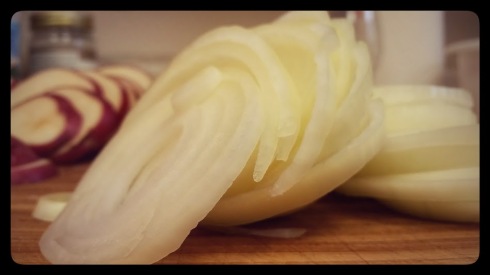
Blue in Green – a “subtly shifting” cocktail.

Check out the Mixology Monday round up here.


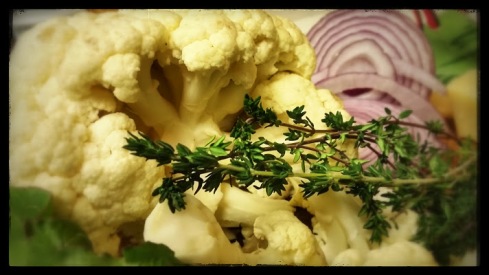
Kind of like Ottolenghi’s Cauliflower Cake

But not quite.

I love thyme

I am not really that familiar with Yotam Ottolenghi’s work, but he is apparently pretty buzz worthy these days.  Especially if you are a vegetarian and/or a follower of the British culinary scene.

We, however, were introduced to him via the gift of a cookbook.  Specifically, Plenty More.  It is a fascinating book.  Fun combinations of ingredients often with interesting preparations and presentations.  Not too mention some really mouthwatering photos, which are laid out in the food paradise manner.  Mine, in contrast, are photographed in the little-kitchen-that-could.

We pretty much want to make (or at least eat) everything in the book, but you’ve gotta start somewhere.  So, after talking about making the cauliflower cake for weeks, I decided, rather randomly, to make it after work.

Cauliflower Cake 3

Turns out, I did not have basil, the rosemary I thought I had was a sad sight and there was only a small chunk of Parmesan… (oddly enough, I did have Nigella seeds…)

Rather than scrap the whole idea, I decided to take the base concept and just use what I did have.  Here’s what I did.

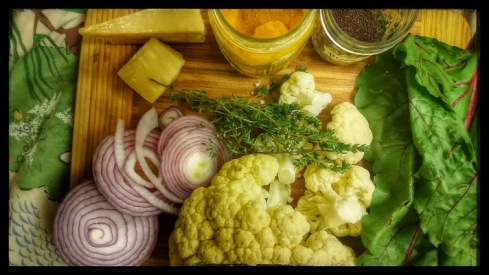
Ingredients 1

Cauliflower Cake

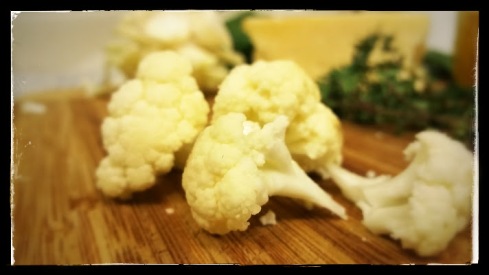
1 Smallish Cauliflower, broken up into bite size florets (I also chopped up and used the stem bits)

1 Medium Red Onion

4 Cloves Garlic

1 Bay Leaf

5 T Olive Oil

1 Bunch Chard, rinsed and stems removed (we’re going to use the stems)

8 Sprigs Thyme

7 Eggs

1 Cup All Purpose Flour

1 1/2 tsp Baking Powder

1 tsp Turmeric

1 Cup Cheddar, grated

1/2 Cup Parmesan, grated

2 T White Sesame Seeds

2 tsp Nigella Seeds (Poppy Seeds or Black Sesame Seeds will also work)

2 tsp Mustard Seeds

Salt and Black Pepper

A bit of Butter

You’ll also need parchment paper and a 9 1/2 inch spring form pan

Alright preheat your oven to 400 F.

Cauliflower

Take the cauliflower pieces and place them in a pot.  Sprinkle over them 1 tsp or so of salt then add enough water to cover.  Simmer for about 15 minutes until they are quite soft, but not disintegrating. Strain and leave them in the colander to air dry while you prepare the rest.

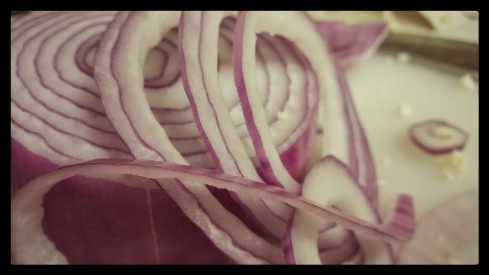
Red Onion

With the red onion, we want to slice off some nice rings about a quarter inch thick.  Set those aside.  We’ll be using them for decorative effect later on.  Deeply colored rings are going to look best here, no harm in being selective.  The red onion I had was a lighter purple color and the end look was a bit washed out.  Give the rest of the onion, along with the garlic and chard stems, a rough chop.

In a large saute pan, heat the olive oil over medium until it shimmers.  Then add the onion, garlic, chard stems, bay leaf, 2 sprigs of thyme, and a pinch of salt and pepper.  Saute for about 10 minutes until soft.  The remove from the heat to cool and discard the thyme sprigs and the bay leaf.

Eggs with Dry Ingredients

In a large bowl, whisk the eggs.  Add the roughly chopped chard leaves, and the onion mixture.  Remove the thyme leaves from their stems and add the leaves to the bowl as well.  Whisk it all around again.  Add the flour, baking powder, turmeric, a tsp of salt, and a tsp of black pepper.  Whisk it until smooth.  Add in the cheese, reserving about 1/4 cup cheddar.  Whisk to incorporate.  Gently stir in the cauliflower.

Seeds

Now let’s prep the spring form pan.  Cut a parchment circle to fit the bottom of the pan.  Then cut a strip of parchment long enough to run the circumference of the pan and overlap itself by a couple of inches.  This overlap will help stick the parchment ends together and keep the strip in place.  Lay out this strip and rub with liberally with butter like your buttering a pan.  Fit that strip around the sides of the pan with the buttered side facing inward.  In a small bowl, mix the sesame, nigella, and mustard seeds together.  Toss the seeds around evenly on the buttered side-strip of parchment, we want them to stick.

Seeds on the Side

Pour the cauliflower mixture into the pan.  Spread it out evenly and sprinkle around the reserved cheddar.  Then arrange the red onion rings on the top.

Ready to Bake

Pop it in the oven and bake for about 45 minutes, until golden brown and a cake tester inserted in the center comes out clean.  Remove from the oven and let rest on a cooling rack for 20 minutes.  Serve warm or at room temperature.

Cauliflower Cake 2


Please Bring Me Some Figgy Pudding

“like a speckled cannon-ball, so hard and firm, blazing in half of half-a-quartern of ignited brandy, and bedight with Christmas holly stuck into the top. Oh, a wonderful pudding!”

Charles Dickens, ‘A Christmas Carol’

Lemon Zest

Craisins

Our Christmas dinners for the last 10 years or so have found inspiration from cultures all over the world.  China, Italy, Sweden, Mexico, Germany…  Some of these cultural traditions have stuck around and carried over year after year.  Slowly, a new tradition has started to emerge, an “our” tradition, curated from our global holiday explorations, and a few things that have been passed down to us.

About four years ago, our Christmas season found us exploring England.  There were two key elements of a classic English Christmas that we embraced more than the others and have added those traditions each year after.

1) Christmas Crackers – fun filled decorative paper tubes that give a little pop when the two ends are pulled apart.  Perhaps the best part of these would be the colorful paper hats (crowns) that are inside.  Everything feels so much lighter and more festive while wearing a paper crown!

2) Christmas Pudding – A sort of cake created with an assortment of ingredients, hours of steaming/boiling, days of waiting, more boiling, and then, flaming whiskey.  We love it!

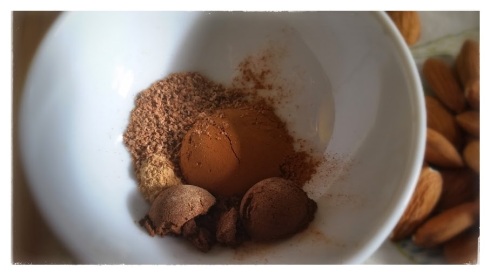
Spice

The “pudding” is often stirred up and cooked at least a month before serving.  This stirring is traditionally done on Stir-Up Sunday (it totally sounds like I just made that up, but I didn’t, seriously), where each person in the household gives the mixture a stir for luck in the new year.  The pudding is, then, hung in the cellar (or other cool dark place) until the big day.

In a pinch, I suppose the whole recipe could be done in two days, but it just wouldn’t be the same…  The resting period helps all of the flavors come together to develop complexity and unity.  I would try to give it at least a week.  (Last year I didn’t get to making it soon enough, so we postponed eating it until New Years.  Just sayin’ that it’s not too late for you all to make some…)  You could also mix it up months in advance.  I’ve read about puddings being mixed up in June!

Today, In the spirit of giving…  Here is my Christmas Pudding recipe.

Christmas Pudding Ingredients

Christmas Pudding

6 oz  Dried Currants

6 oz  Raisins, chopped

8 oz  Sultanas, chopped (Golden Raisins)

2 oz  Dried Cranberries, chopped (Craisins)

6 oz  Dried Figs, stems removed and chopped (I like a mix of Mission and Turkish figs)

5 Tbs  Whiskey (We use bourbon, but brandy, rum, scotch, or other whiskey would all work well)

6 oz  All-purpose Flour

3 oz  Plain Bread Crumbs (We use Panko)

1/2 tsp  Nutmeg, ground

1 tsp  Cinnamon, ground

1/4 tsp  Ginger, ground

1/2 tsp  Allspice, ground

1/4 tsp Clove, ground

1/2 tsp Salt, kosher

3 oz  Brown Sugar

1  Medium-Large Carrot, peeled and grated

3 oz  Almonds, finely chopped

1  Apple, cored and grated

Zest and Juice of 1/2 an Orange

Zest and Juice of 1/2 a Lemon

4 oz Beef Suet, grated (It is easier to grate if it is frozen)

4  Eggs, beaten

150 ml of Beer (Darker English ales work great for this)

Now that’s an ingredient list!  Yes, there are simpler, more minimalist versions of this, but this one is awesome in all its ridiculousness.

In a medium bowl add the dried fruit along with 5 Tbs of whiskey.  Stir it around and let macerate while you prepare the rest of the mix, or let it sit overnight, covered and at room temperature.

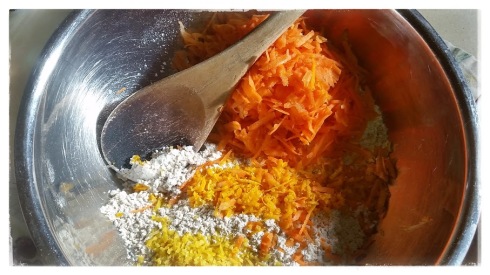
Carrot and Zests

In a large bowl stir together the flour, bread crumbs, sugar and spices.  Add the carrots, almonds, apple, suet, and citrus peels and juices.  Give it another stir.

Now add the dried fruit along with any residual steeping liquid.  Stir.  Add eggs and beer.  Now is the time to give everyone else a turn at stirring!

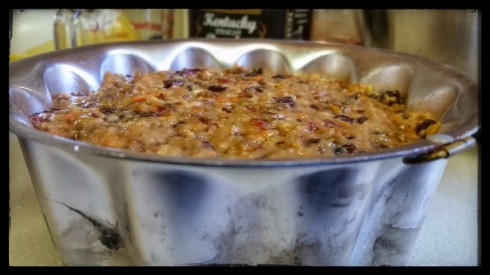
Pudding in the Mold

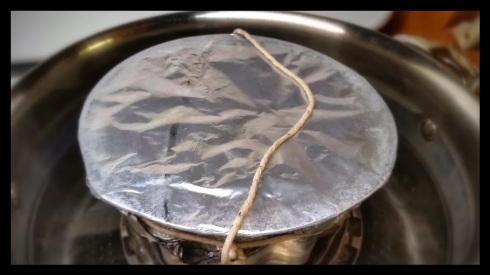
Grease or spray two pudding basins and then fill each with the pudding mixture.  Cover with a layer of parchment paper and then a layer of foil.  Securing them with kitchen twine.

Making a twine handle helps to lift it out of the pot.  It is also a handy if you were wanting to hang your pudding off the ground.

Making a twine handle helps to lift it out the pot. It also comes in handy if you were wanting to hang your pudding off the ground.

Pudding in the Pot

Place each pudding into a separate pot and add water until the levels reach about half way up the basins.  Bring water to a boil, reduce to a lively simmer and cover.  Simmer for 6 hours, periodically checking the water level.

Post Boil

Remove and allow to cool.  Store in a cool, out of the way spot for a month or so.

On the desired day, replace the parchment paper and foil with fresh wrappings and boil again for 2 hours.  Turn it out of the mold after it has cooled a bit.  Then, when ready to serve pour an ounce or so of whiskey over the top of the cake and light it on fire.  Serve with brandy butter or a simple icing.

Circa 2011

Circa 2011

Merry Christmas!


Pumpkin Beer to the Rescue

Thanksgiving feast was laid out in all its delicious magnificence.  Days of culinary dabbling had finally culminated to this moment.   After hours of toiling and waiting…were all quite hungry.  It was at that moment, we realized that something was missing…

Pumpkin!

Pumpkin!

Where is the Pumpkin!

We remembered that cute little rouge-ish pumpkin from the CSA.  The one we had kind of been saving for such an occasion as this.  It was still sitting there.  Not anywhere near cooked to perfection.  So there it was: We had made nothing with pumpkin.  No pumpkin pie, no pumpkin breads.  Not even a squash (or sweet potato for that matter.)  It didn’t seem right to have Thanksgiving without pumpkin and just as it seemed all hope was lost…  Pumpkin beers to the rescue!

In honor of their late arrival to our holiday menu, we’ve put together another round-up of the sometimes awful and sometimes marvelous, celebrated and/or maligned seasonal beverage.

(Previously on pumpkin beers we tasted these, click here to revisit.)

For 2014, we have 13 new beers to try!  Well technically, we’ve had a couple of these before, but whatever.  Let’s start at the bottom and work up.

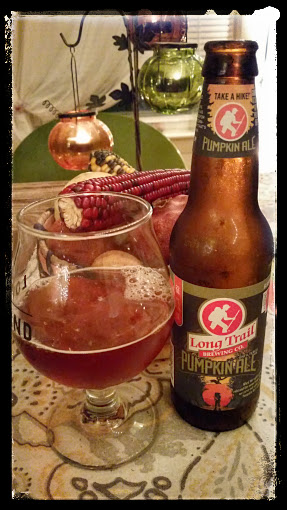
Long Trail Pumpkin Ale

Long Trail Pumpkin Ale

#13 Long Trail Brewing Pumpkin Ale  – Score 1.5

I can only imagine that this beer was tainted somehow.  Sour, musty aromas lead to astringent bitter flavors, heavy on the spice.  The body and carbonation were nice, but the flavor was just not pleasant.

Magic Hat Wilhelm Scream

Magic Hat Wilhelm Scream

#12 Magic Hat Wilhelm Scream – Score 2

This was at least one of the most unique renditions.  The aroma was very earthy and vegetal.  It tasted like raw squash with hints of baking spice and a touch of demerara sugar.  Finishing lightly astringent with a fresh grind of black pepper.  We just couldn’t get into that vegetal assault.  Not really into drinking raw pumpkins, I guess.

Pumple Drumkin

Pumple Drumkin

#11 Cisco Brewers Pumple Drumkin – Score 3

It’s too bad it doesn’t taste as cute as the little pumpkin critter on the can.  There just isn’t that much going on here.  Lots of carbonation and a creamy mouth-filling body, but there is also too much bitterness.  Some light sour notes and a biscuity finish pretty mush wraps it up.  The faint spice and pumpkin notes are almost totally lost.

Traveler Jack-O-Shandy

Traveler Jack-O-Shandy

#10 The Traveler Beer Co. Jack-O-Shandy – Score 3.5

So this could arguably, not qualify for a pumpkin beer since it is really a shandy. A shandy is half beer and half lemonade.  The Jack-O-Shandy tasted like an Arnold Palmer with a sprinkle of cinnamon, ginger, and raisin.  Fuzzy carbonation, light pumpkin essence, and a bit of malt flavor on the dry finish.  The cloudy, brownish appearance was not very appealing.  Over all, the lemon tea flavors were somewhat refreshing, but this is definitely not something I’d buy again.

Red Hook Out of Your Gourd

Red Hook Out of Your Gourd

#9 Red Hook Out of Your Gourd – Score 3.75

I really like the idea of a pumpkin porter and still hold out hope that there is a truly rockin’ version of it.  I will try to seek one out for next year…  This wasn’t a bad beer, just not very good one.  The porter characteristics dominated with roasty flavors of coffee, dark brown sugar, and black pepper.  The finish was bitter, dry, roasty, and lightly sour.  The pumpkin and spice notes were very subtle, which for some might be preferable, but when evaluating pumpkin beers, those attributes should be more noticeable.  Admittedly, had it been a better porter underneath, I would have put less emphasis on that short coming.  There were slight hints of cinnamon, clove, but no pumpkin.  The body was lighter than I would have liked.  All in all, it didn’t start with a particularly stellar porter base and the “pumpkin beer” attributes were too subdued to cover that up.

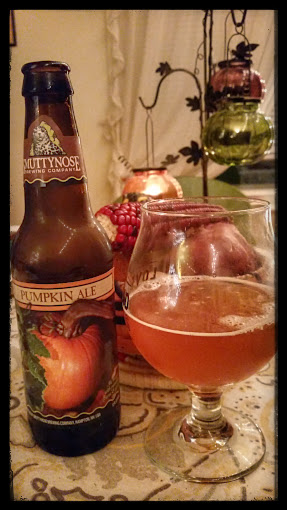
Smuttynose Pumpkin Ale

Smuttynose Pumpkin Ale

#8 Smuttynose Brewing Co. Pumpkin Ale – Score 4

Very nice aroma: floral, bright lemon peel and spice.  Warming on the palate with cinnamon and clove spices, but bitter.  Medium body.  Unfortunately, I liked the way it smelled more than the way it tasted.  An okay beer, but nothing special.

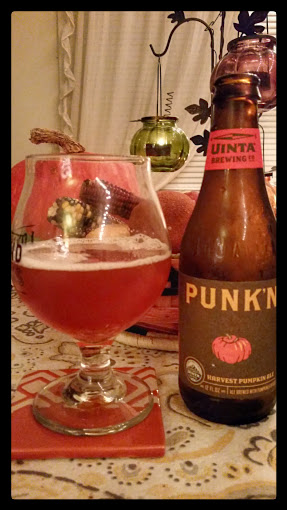
Uinta Punk'n

Uinta Punk’n

#7 Unita Punk’n – Score 5

Pumpkin and spice aromas and flavors are present, but not over-whelming or particularly defined.  Light musty, fermented fruit aromas.  Some additional sour (Meyer lemon) flavor with a bit of red hot and Smarties candy on the finish/aftertaste.  Easy drinking, but definitely not tradition worthy.

Weyerbacher Imperial Pumpkin Ale

Weyerbacher Imperial Pumpkin Ale

#6 Weyerbacher Imperial Pumpkin Ale – Score 5.75

Cardamom is big in this beer.  Nutmeg and black pepper are also present along with fried sage, demerara sugar with a hint of roasted squash.  The cardamom intensity was a bit more than we liked.  A decent pumpkin beer, but not one that we would seek out for next year.

Waterfront Spiced Pumpkin

Waterfront Spiced Pumpkin Ale

# 5 Waterfront Spiced Pumpkin Ale – Score 6

I’m actually surprised that this beer ranked as high as it did.  It was the first one we tasted and it was brewed by Shipyard.  We are typically not big fans of Shipyard brewed beers and we certainly didn’t care for their namesake pumpkin beer.  However, this was a balanced, nicely carbonated beer with the right holiday aromas and flavors of cinnamon, pumpkin (most notably in the aroma).   There is even a little hint of pastry crust.  I wouldn’t commit to purchasing a full 12 pack… we didn’t like it that much.  However in a mixed 6-pk, I would consider adding a bottle or two.

Long Trail Imperial Pumpkin

Long Trail Imperial Pumpkin

#4 Long Trail Brewing Co. Imperial Pumpkin – Score 6.5

This beer is part of the Brush and Barrel Series.  We’ve sampled a few beers from this series and they were all pretty good.  We really enjoyed this beer last year and while we still liked it this year, we were a bit less impressed.  Circus peanuts dominated the aroma / flavor.  Along with candied yams, marshmallow cream, and Banana Runts candy, this beer seemed less like a pumpkin beer and more like a Halloween-candy-bag beer.  It had a nice creamy full body with well integrated spice notes and a dry finish.  The hops, however, were a bit much and seemed to clash with the rest of the beer.
Dogfish Head Punkin Ale

Dogfish Head Punkin Ale

#3 Dogfish Head Punkin Ale – Score 8

This beer has been a regular addition to our holiday season for some time now and it continues to deliver the right balance between solid beer making and additions of pumpkin and spice.  It starts off with sweet notes of brown sugar and caramel malts.  Then comes the spice: cinnamon and allspice with hints of hops and pumpkin on a creamy, medium to full body.   It finishes pleasantly hoppy and dry.  Leaving you ready for another sip!  This is a tradition that will continue for sure.

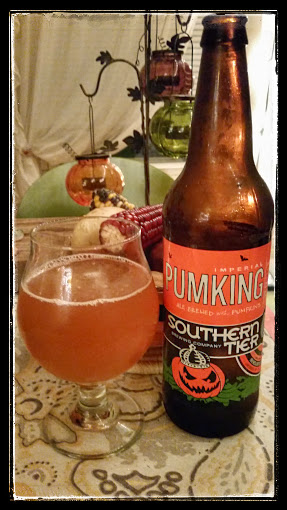
Southern Tier Pumking

Southern Tier Pumking

#2 Southern Tier Pumking – Score 8.25

I suppose one could say that this isn’t a pumpkin beer, but rather a pie crust beer.  Either way, it’s definitely seasonal and definitely delicious.  Biscuity aromas lead to flavors of pie crust, graham cracker, gingerbread, baking spices (cinnamon and ginger), and vanilla custard.  Hints of hazelnut and pecan pie.  Pumking is the beer equivalent of a soft, warm blanket.

And for our favorite pumpkin beer of all… so far…

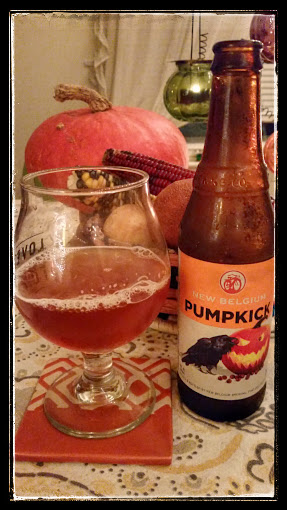
New Belgium Pimpkick

New Belgium Pimpkick

#1 New Belgium Pumpkick – Score 9.5

Nearing perfection, the Pumpkick delivers it all plus a little bit extra that tips it into the outstanding category.  The nose is like pumpkin pie: full of spice (allspice), biscuit, mild pumpkin, and a hint of cranberry.  It all happens again on the palate with flavors of pumpkin butter, brown sugar, allspice, and cinnamon.  It’s that juicy tart cranberry twist at the end that kicks this beer to the top.  That tart pop balances the sweetness and richness of the other flavors keeping the beer lively and engaging.  The spices and pumpkin taste fresh and are well integrated into the malty backbone of the beer.  A complex brew that evokes the season!  We only wish it was available in Maine.

Pumpkin Beer Line Up 2014

Pumpkin Beer Line Up 2014

Until next year, Happy Holidays and bring on the Winter Warmers!


The Gentle Kind

Trial & mirror

frugalfeeding

n. frugality; the quality of being economical with money or food.

Cold Glass

You can make these cocktails. Start right now.

Milkweed Farm

A coastal Maine farm that employs sustainable organic and biodynamic farming practices.

The Liquid Culture Project

Dedicated to a Culture of Better Drinking

Putney Farm

Get some good food. Cook it. Share with friends. Have a cocktail.

Boozed + Infused

Infusing liqueurs at home with inspiring and seasonal ingredients