Category Archives: Baking

Kind of like Ottolenghi’s Cauliflower Cake

But not quite.

I love thyme

I am not really that familiar with Yotam Ottolenghi’s work, but he is apparently pretty buzz worthy these days.  Especially if you are a vegetarian and/or a follower of the British culinary scene.

We, however, were introduced to him via the gift of a cookbook.  Specifically, Plenty More.  It is a fascinating book.  Fun combinations of ingredients often with interesting preparations and presentations.  Not too mention some really mouthwatering photos, which are laid out in the food paradise manner.  Mine, in contrast, are photographed in the little-kitchen-that-could.

We pretty much want to make (or at least eat) everything in the book, but you’ve gotta start somewhere.  So, after talking about making the cauliflower cake for weeks, I decided, rather randomly, to make it after work.

Cauliflower Cake 3

Turns out, I did not have basil, the rosemary I thought I had was a sad sight and there was only a small chunk of Parmesan… (oddly enough, I did have Nigella seeds…)

Rather than scrap the whole idea, I decided to take the base concept and just use what I did have.  Here’s what I did.

Ingredients 1

Cauliflower Cake

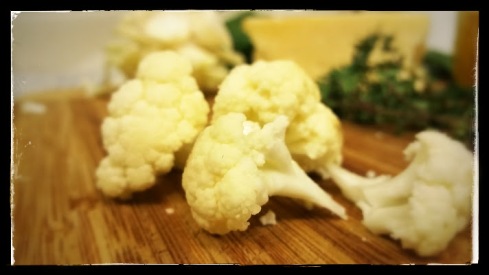
1 Smallish Cauliflower, broken up into bite size florets (I also chopped up and used the stem bits)

1 Medium Red Onion

4 Cloves Garlic

1 Bay Leaf

5 T Olive Oil

1 Bunch Chard, rinsed and stems removed (we’re going to use the stems)

8 Sprigs Thyme

7 Eggs

1 Cup All Purpose Flour

1 1/2 tsp Baking Powder

1 tsp Turmeric

1 Cup Cheddar, grated

1/2 Cup Parmesan, grated

2 T White Sesame Seeds

2 tsp Nigella Seeds (Poppy Seeds or Black Sesame Seeds will also work)

2 tsp Mustard Seeds

Salt and Black Pepper

A bit of Butter

You’ll also need parchment paper and a 9 1/2 inch spring form pan

Alright preheat your oven to 400 F.

Cauliflower

Take the cauliflower pieces and place them in a pot.  Sprinkle over them 1 tsp or so of salt then add enough water to cover.  Simmer for about 15 minutes until they are quite soft, but not disintegrating. Strain and leave them in the colander to air dry while you prepare the rest.

Red Onion

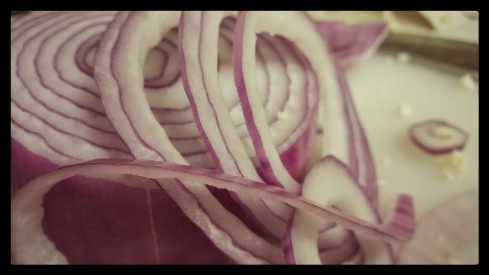
With the red onion, we want to slice off some nice rings about a quarter inch thick.  Set those aside.  We’ll be using them for decorative effect later on.  Deeply colored rings are going to look best here, no harm in being selective.  The red onion I had was a lighter purple color and the end look was a bit washed out.  Give the rest of the onion, along with the garlic and chard stems, a rough chop.

In a large saute pan, heat the olive oil over medium until it shimmers.  Then add the onion, garlic, chard stems, bay leaf, 2 sprigs of thyme, and a pinch of salt and pepper.  Saute for about 10 minutes until soft.  The remove from the heat to cool and discard the thyme sprigs and the bay leaf.

Eggs with Dry Ingredients

In a large bowl, whisk the eggs.  Add the roughly chopped chard leaves, and the onion mixture.  Remove the thyme leaves from their stems and add the leaves to the bowl as well.  Whisk it all around again.  Add the flour, baking powder, turmeric, a tsp of salt, and a tsp of black pepper.  Whisk it until smooth.  Add in the cheese, reserving about 1/4 cup cheddar.  Whisk to incorporate.  Gently stir in the cauliflower.

Seeds

Now let’s prep the spring form pan.  Cut a parchment circle to fit the bottom of the pan.  Then cut a strip of parchment long enough to run the circumference of the pan and overlap itself by a couple of inches.  This overlap will help stick the parchment ends together and keep the strip in place.  Lay out this strip and rub with liberally with butter like your buttering a pan.  Fit that strip around the sides of the pan with the buttered side facing inward.  In a small bowl, mix the sesame, nigella, and mustard seeds together.  Toss the seeds around evenly on the buttered side-strip of parchment, we want them to stick.

Seeds on the Side

Pour the cauliflower mixture into the pan.  Spread it out evenly and sprinkle around the reserved cheddar.  Then arrange the red onion rings on the top.

Ready to Bake

Pop it in the oven and bake for about 45 minutes, until golden brown and a cake tester inserted in the center comes out clean.  Remove from the oven and let rest on a cooling rack for 20 minutes.  Serve warm or at room temperature.

Cauliflower Cake 2


Please Bring Me Some Figgy Pudding

“like a speckled cannon-ball, so hard and firm, blazing in half of half-a-quartern of ignited brandy, and bedight with Christmas holly stuck into the top. Oh, a wonderful pudding!”

Charles Dickens, ‘A Christmas Carol’

Lemon Zest

Craisins

Our Christmas dinners for the last 10 years or so have found inspiration from cultures all over the world.  China, Italy, Sweden, Mexico, Germany…  Some of these cultural traditions have stuck around and carried over year after year.  Slowly, a new tradition has started to emerge, an “our” tradition, curated from our global holiday explorations, and a few things that have been passed down to us.

About four years ago, our Christmas season found us exploring England.  There were two key elements of a classic English Christmas that we embraced more than the others and have added those traditions each year after.

1) Christmas Crackers – fun filled decorative paper tubes that give a little pop when the two ends are pulled apart.  Perhaps the best part of these would be the colorful paper hats (crowns) that are inside.  Everything feels so much lighter and more festive while wearing a paper crown!

2) Christmas Pudding – A sort of cake created with an assortment of ingredients, hours of steaming/boiling, days of waiting, more boiling, and then, flaming whiskey.  We love it!

Spice

The “pudding” is often stirred up and cooked at least a month before serving.  This stirring is traditionally done on Stir-Up Sunday (it totally sounds like I just made that up, but I didn’t, seriously), where each person in the household gives the mixture a stir for luck in the new year.  The pudding is, then, hung in the cellar (or other cool dark place) until the big day.

In a pinch, I suppose the whole recipe could be done in two days, but it just wouldn’t be the same…  The resting period helps all of the flavors come together to develop complexity and unity.  I would try to give it at least a week.  (Last year I didn’t get to making it soon enough, so we postponed eating it until New Years.  Just sayin’ that it’s not too late for you all to make some…)  You could also mix it up months in advance.  I’ve read about puddings being mixed up in June!

Today, In the spirit of giving…  Here is my Christmas Pudding recipe.

Christmas Pudding Ingredients

Christmas Pudding

6 oz  Dried Currants

6 oz  Raisins, chopped

8 oz  Sultanas, chopped (Golden Raisins)

2 oz  Dried Cranberries, chopped (Craisins)

6 oz  Dried Figs, stems removed and chopped (I like a mix of Mission and Turkish figs)

5 Tbs  Whiskey (We use bourbon, but brandy, rum, scotch, or other whiskey would all work well)

6 oz  All-purpose Flour

3 oz  Plain Bread Crumbs (We use Panko)

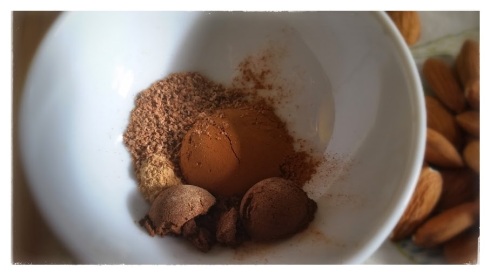
1/2 tsp  Nutmeg, ground

1 tsp  Cinnamon, ground

1/4 tsp  Ginger, ground

1/2 tsp  Allspice, ground

1/4 tsp Clove, ground

1/2 tsp Salt, kosher

3 oz  Brown Sugar

1  Medium-Large Carrot, peeled and grated

3 oz  Almonds, finely chopped

1  Apple, cored and grated

Zest and Juice of 1/2 an Orange

Zest and Juice of 1/2 a Lemon

4 oz Beef Suet, grated (It is easier to grate if it is frozen)

4  Eggs, beaten

150 ml of Beer (Darker English ales work great for this)

Now that’s an ingredient list!  Yes, there are simpler, more minimalist versions of this, but this one is awesome in all its ridiculousness.

In a medium bowl add the dried fruit along with 5 Tbs of whiskey.  Stir it around and let macerate while you prepare the rest of the mix, or let it sit overnight, covered and at room temperature.
Carrot and Zests

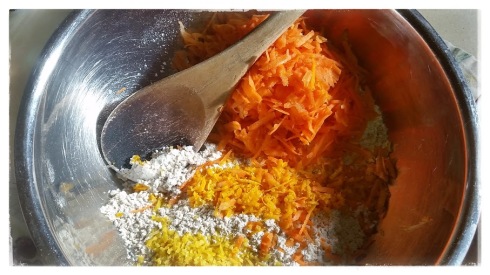
In a large bowl stir together the flour, bread crumbs, sugar and spices.  Add the carrots, almonds, apple, suet, and citrus peels and juices.  Give it another stir.

Now add the dried fruit along with any residual steeping liquid.  Stir.  Add eggs and beer.  Now is the time to give everyone else a turn at stirring!

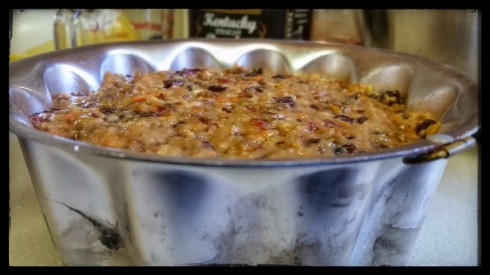
Pudding in the Mold

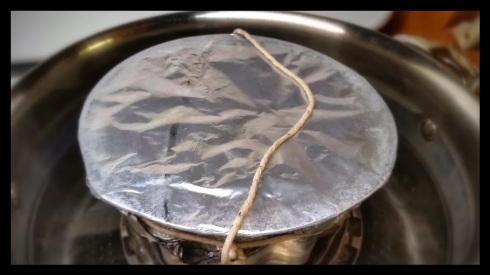
Grease or spray two pudding basins and then fill each with the pudding mixture.  Cover with a layer of parchment paper and then a layer of foil.  Securing them with kitchen twine.

Making a twine handle helps to lift it out of the pot.  It is also a handy if you were wanting to hang your pudding off the ground.

Making a twine handle helps to lift it out the pot. It also comes in handy if you were wanting to hang your pudding off the ground.

Pudding in the Pot

Place each pudding into a separate pot and add water until the levels reach about half way up the basins.  Bring water to a boil, reduce to a lively simmer and cover.  Simmer for 6 hours, periodically checking the water level.

Post Boil

Remove and allow to cool.  Store in a cool, out of the way spot for a month or so.

On the desired day, replace the parchment paper and foil with fresh wrappings and boil again for 2 hours.  Turn it out of the mold after it has cooled a bit.  Then, when ready to serve pour an ounce or so of whiskey over the top of the cake and light it on fire.  Serve with brandy butter or a simple icing.

Circa 2011

Circa 2011

Merry Christmas!


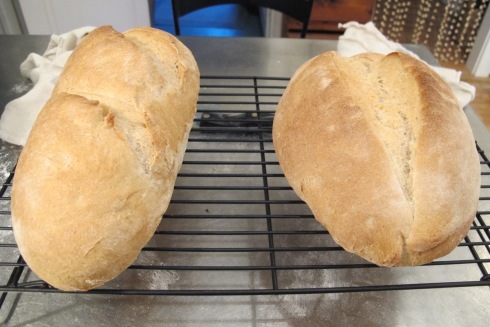
Pain à l’Ancienne (It’s Bread #5)

Bread #5

Bread #5

My journey into bread baking is far from over.  However, I have come across a recipe and method that has yielded exactly what I have been aiming for up to this point.

Big bubbly crumb – check

Chewy moist interior – check

Crisp and crackly crust – check

Nuanced and deep flavor – check

I shall continue to refine this recipe to my equipment and taste preference.  I will also delve back into the land of wild yeast and sourdough starters.

For now, though, my latest and greatest comes from the venerable Peter Reinhart via his book The Baker’s Apprentice.  It is also, as I’ve come to find out, featured in numerous other posts with slight variations across the blogosphere.  This is a great book providing me with some new and interesting information to take my bread onto the next level.  If you like to bake bread or want to bake bread, I would recommend this book to you.

So here it is:

Pain à l’Ancienne

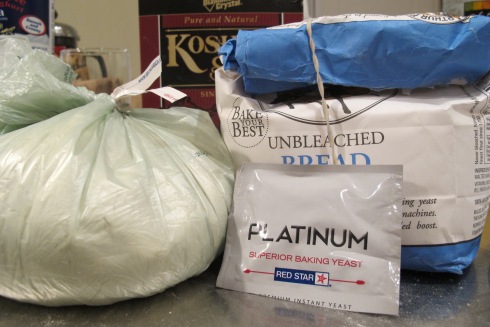
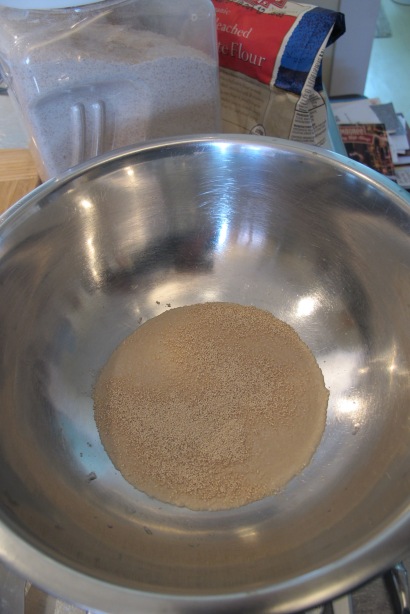
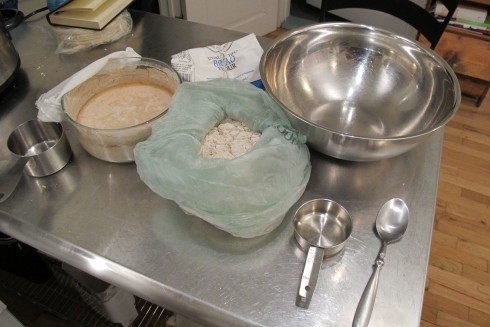
Flour, Salt, Yeast

Flour, Salt, Yeast

27 oz  Bread Flour (I mistakingly used an Organic All-Purpose flour from the bulk bin at Whole Foods instead.  I really like the flavor of the finished bread so I’ve kept using that flour in place of or for at least half of the called for bread flour.)

.6 oz Kosher Salt

.2 oz Instant Yeast

19-24 oz  Cold Water (I usually use 20 ounces)

The evening before you plan to bake:

Weigh out the water in a quart measuring cup, then add some ice.  8 cubes?

In a medium bowl combine flour, salt, and yeast.  Then, add 20 ounces of water.  Stir it around to combine.  When you’ve got a dough ball of sorts (it is a wet dough), continue to stir/fold for another few minutes.  I think of it as kneading with a spoon.  You’re looking for the dough to more or less easily pull away from the sides of the bowl when you’re stirring it.  It will stick to the bottom.  If the dough is not coming away from the sides add a bit more flour and work it in so that it is a little less sticky.  In the unlikely event that  your dough forms a non-sticky ball that holds its shape really well, add more water, a couple tablespoons at a time.

Spray another medium/large bowl with a cooking spray or rub with a little olive oil.  Transfer the dough to this bowl and spray the top of it or if using oil, you can attempt to roll it around or just not worry about it.  Cover the bowl with plastic wrap and refrigerate over night.

Ready to Refrigerate Over Night

Ready to Refrigerate Over Night

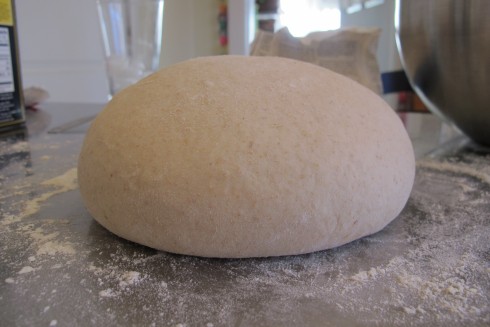
The next morning, remove the dough from the refrigerator.  It might have puffed slightly.  Let it rest at room temperature for 2-4 hours to take out the chill and allow the dough to swell to about double it’s pre-refrigerated volume.

Ready to proceed to the next step?  Then, position your bread stone and a pan for a steam bath in your oven.  Preheat it to at least 500F, if your oven goes higher then feel free to preheat as hot as 550F.  My oven goes to 525, so that’s where I charge it.

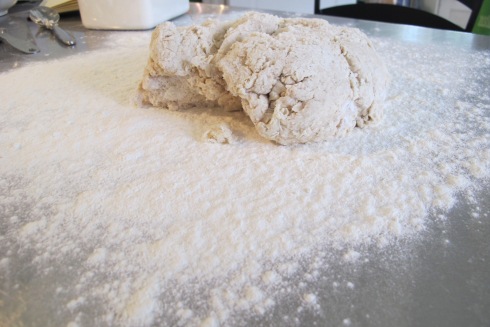
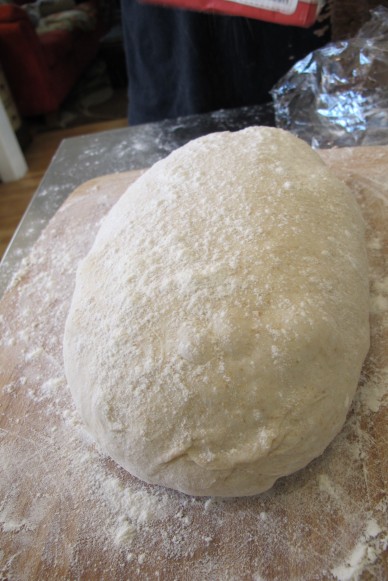
Dough on a Floured Surface

Dough on a Floured Surface

For the shaping, gently turn the dough out onto a well floured surface.  Sprinkle a little flour on top of the dough and lightly roll it around to coat it thoroughly while trying to degas the dough as little as you can.  Stretch and lightly shape into a rectangle 8 inches x 6 inches.  Using a pastry cutter dipped in cold water, press down into the dough to cut it in half width-wise.  Let the it rest for 5 minutes.

Line the back of a sheet pan with parchment paper sprinkled with semolina flour.

Cutting the Dough

Cutting the Dough

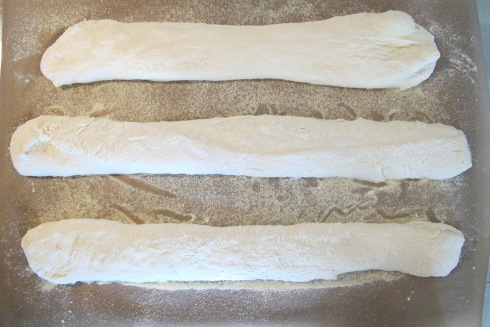
Cover one half loosely with plastic wrap.  With the other half, lightly press it into a rough rectangle of relatively even thickness, cut length-wise into 3 strips with the same pressing down of the wet pastry cutter technique.  Gently transfer the strips onto the parchment stretching/pulling them to about the length of the pan.  If they shrivel back up right away, let them rest for another 5 minutes and pull them out again.  Score the tops of these if the dough cooperates with you.

Stretched and On Parchment

Stretched and On Parchment

After the oven has preheated for at least 45 minutes, slide the parchment off of the sheet pan onto the bread stone.  Add a cup of hot water to the steam bath pan and close up the oven.  3o seconds later spray the walls of the oven with water from a spray bottle.  Do that another two times at 30 second intervals and then lower the heat to 475F.

While those are baking, prepare the other 3 strips using the remaining half of dough.

Check in 8-9 minutes of baking to see if the loaves are browning evenly.  You may want to give them a 180 degree turn.

Continue baking for another 10-15 minutes or until the internal temperature of the bread reaches 205F.  Cool on a wire rack for about 20 minutes.  Turn the oven back up to 500-550F, let it heat for at least 20 minutes before proceeding with baking the remaining loaves.

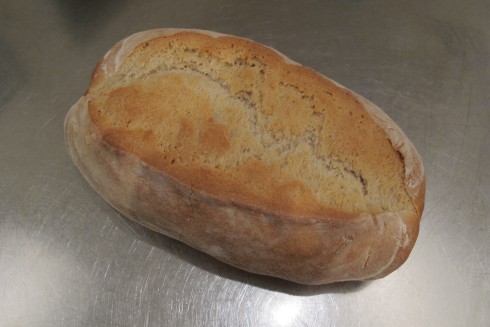
Mini Baguettes plus Ciabatta

Mini Baguettes plus Ciabatta

Crumb

Crumb


Bread Again aka Bread # 4

I worked with a local baker for a day in hopes of picking up some tips and tricks regarding my pursuit of baking great bread.  I picked up a flour – water – starter ratio (3:2:1) and better idea of the final feel dough post kneading.  I kneaded a lot of dough that day.  I still have work to do in order to get the bread dialed in just right, but here is the next segment of my bread baking journey.

Bread # 4

(We’ll call it number four to be consistent with the blog, but it is really like Bread #9.)

1/4 Cup  Warm Water

2 tsp  Yeast, dried

In a medium bowl, add the water then sprinkle the yeast on top.  Allow the yeast to bloom for about 5 or so minutes.

Add:

55 g  Water

Stir into the yeast liquid.  Then add your flours:

55 g  Whole Wheat Flour

55 g  All Purpose Flour

Stir it all up, cover, and let that rise for 2 hours.

The dough should be nice and poofed/bubbly by this point.

You’ll want to do this next bit on a kitchen scale.  Scrape the starter dough into a large bowl which is on the scale.  The starter should be   about 212 grams, give or take a gram.  This is now 1 part.

Add that starter:

424 g  Water (or two parts)

Stir it around to loosen up the starter a bit.  Now add 3 parts Flour which would be 636 grams.  The flour gives you some room to customize.  I used:

100 g  Whole Wheat Flour

536 g  All Purpose Flour

and

3 tsp  Kosher Salt

Mix all this up until the spoon becomes ineffective and then turn out onto a well floured surface.

Knead the dough for about 30 minutes.  Your are looking for the dough to be lightly tacky, but not sticky.  I ended up adding another 1/2 to 3/4 cup All Purpose flour during this kneading process…

Once you get the dough where you want it.  Toss it into a bowl, cover, and rise for 1.5 to 2 hours.

Then take your big ball of dough and separate it into two pieces forming each piece into a tight boule.  Put those back into the bowl, cover it again and let them rest for about 20 minutes.

Next, I did a final shaping making nice and tight, but also trying not to press out all of the air bubbles that were in the dough.

Place these onto a floured cloth, somewhat covered with the extra cloth.  Let it rise for another 1-2 hours.

About an hour before you expect to be ready to bake the bread, you’ll want to get your oven heating up.  Get your baking stone and a pan for a steam bath in place in your oven and preheat to 500 F.

Now your bread is ready.  Prep a peel or, as is my case, a wooden cutting board with a dusting of semolina flour.  Gently move the loaves to the “peel.”  Score the tops any which way you like, but aim for having your knife at a 45 degree angle.  Turn the heat on the oven down to 450 F.  Have a cup of hot water (from the tap is fine) standing by.

Open the oven slid on in your soon-to-be bread and pour the water into the hot pan.  Set your timer for 25 minutes and listen to the oven roar.

Cool on a wire rack.

Final thoughts:

The crumb was still a bit more dense than I want it to be.  The crust was a nice color, however, I didn’t get the spring I was hoping for, since “skin” looked as if it had sagged during baking.  See:

It could be that I didn’t shape the final loaf tight enough…  I probably could have baked it another 5 minutes and maybe next, time I’ll keep the oven 25 degrees hotter.  Another tsp of salt wouldn’t hurt either.

On the plus side, it wasn’t dry or crumbly.  It had a very nice flavor and texture, maybe a little bit more chewiness would be nice, but I won’t fault that.  At least not at this point.  Possibly adding 1oo – 200 g Bread Flour would help add a tough of chew.


Almost There aka Bread # 3

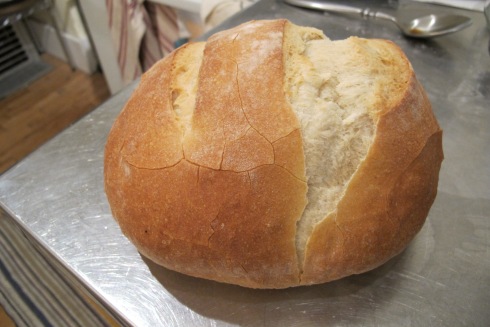
This one turned out pretty good.  I still want to work on getting an airier interior, but this is the best looking bread I have achieved so far.

Bread #3

Sponge:

1 1/2 Cups (213 g) Bread Flour

1/2 Cup (68 g) Whole Wheat Flour

1 1/2 Cups Water, Room Temperature

1 Cup Yeast Starter

Dough:

1 3/4 Cups (217 g) All Purpose Flour

1/2 Cup (71 g) Bread Flour

2 1/2 tsp (14 g) Kosher Salt

So the night before baking, I mixed up the sponge by combining the flours in a bowl and then adding in the starter and water.  I gave it all a good stir, cover with plastic wrap and let it sit in a moderately cool room (50-60 F).

8 – 12 hours later and there were bubbles!

Now, add in the rest of the ingredients and stir them around.

Turn the dough out onto a floured surface and knead it for about 20 minutes. Until it has a nice soft, smoothness.  Shape the dough into a ball and put it in a bowl, covered with plastic wrap, to rise for about 2 hours.

Now that that rise is over, lightly reshape the dough.  I diverge from my typical MO, pressing down the dough and only gently reshaping it into a baton.  A friend of mine who makes some really nice bread, told me that he has been getting better results with the oven spring and a more airy texture by just punching down the dough and popping it in the oven.  So I’m giving it a go, granted I’m still handling the dough a bit more than I think he did.  The dough is not quite as firm as I’m used too.  I’m fighting the urge to not just throw some more flour on it and start kneading again.  With a wetter dough, the rise seems more outward rather than upward.  (I find this to be true of myself as I age and drink more beer…)  This is why I’m reshaping it a little; I’m trying to encourage a little upward mobility.  I’ve read that a wetter dough can make for a more complex crumb, granted a dough that is too wet will not rise.  Since, I’m baking at altitude, a little extra moisture helps overcome the dry climate.  Anyway, here it is on my makeshift peel:

Cover with plastic wrap and let it rise for an hour.  Preheat the oven to 450F with a pizza stone for 30 minutes.

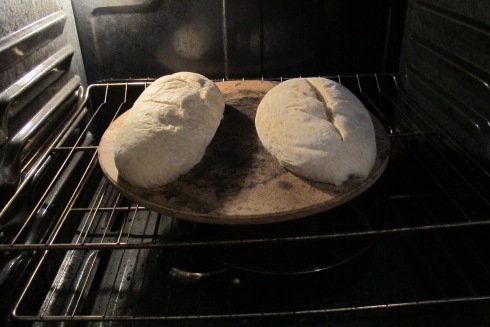
Okay, now it’s ready to go in.  I shake the “peel” a bit to loosen up the bread and make a slash down the center.

I spray a little water, from a spray bottle,  onto the sides of the oven to build up steam and then slide the soon-to-be bread onto the stone.  It bakes for 5 minutes and I spray the oven walls again.  Note: When spraying the oven use caution that you do not spray the light bulb in the back of the oven.  Some oven models have protective coverings on the bulb and some do not.  Mine does not.  During one baking experience I hit the bulb and it exploded.  Little glass pieces flying everywhere.  Luckily no one was injured, but it did make a mess.  An alternative method of introducing steam without spraying is to add an empty pan to the oven during the preheat.  Then bring a couple cups of water to a boil and just before sliding in the dough, pour a cup or two of hot water into the hot pan.  Presto Stem!

After 15 minutes of baking, lower the temperature to 350F and continue baking for another 20 minutes or so…

Ding!  Bread is done.  It looks nice and brown, and sounds somewhat hollow like a drum when tapped on the bottom.  You could also check the internal temperature.  It should register about 210F.
Allow it to cool completely before cutting into it.

So with this loaf, I feel I could have baked it another five minutes.  It was not doughy or anything, just a little moister than I think it needed to be?  Maybe that is nitpicking…

The bread tasted really good.  A light sourness, but I wouldn’t go so far as to call it a sourdough.  Good crisp crust.  The crumb was nice.  It needs to be lighter with more and larger bubbles.  Especially, in the lower center of the loaf.  Texture was a great balance between soft and chewy.  I’m looking forward to Bread # 4!


Pass the Salt aka Bread #2

Recap from Bread #1, I wanted to reduce the chewiness and enlarge the air bubbles in the crumb (the inner bready part) while preserving the crisp crust and flavor quality.

So, without further ado, Bread #2:

2 cups Bread Flour

1 1/2 cups All Purpose Flour

1 tsp Kosher Salt (This was kind of an oversight, it really should have been at least 2 tsp.)

3/4 cup Starter #1

1 cup Water, Room Temperature

The goal of replacing some of the bread flour with all purpose flour is to reduce gluten which is what contributes to the structure of the bread. Bread flour is higher in gluten than all purpose.  Another way of adding gluten to the dough is through the act of kneading; the more you knead, the more you build gluten.  Not enough gluten and the bread does not rise and has a dense crumb.  Too much and the bread can become chewy and tough.  Since the previous bread was too chewy, I figure that by reducing the gluten, the bread would be less chewy.

So, anyway, combine the flours and salt in a large bowl.

I’m not sure what I was thinking.  Bread 2 was kind of a rush job and I had in my head that I only used 1 tsp salt in the last bread, but no.  Adding only 1 tsp of salt is definitely not enough.  Please start with 2 tsp.  You’ll be happier.

Once the flour and salt are satisfactorily mixed, stir in the starter and the water.  Stirring with spoon until it no longer makes sense to do so and then turning out onto a floured surface and kneading.  Add more flour as necessary to achieve a soft smooth dough.  I tried to do this less than last time, see gluten comments above, but I was also pressed for time so it worked out that I had less time to get the perfect texture of dough, as well.

Form into a rough ball and let it rise for about 2 hours in a bowl covered with plastic wrap.

Next, flour your hands and a peel or as is my case a wooden cutting board.  Reshape the dough…  I broke with the traditional boule here and went more of a rustic baton…at least that’s what I’m calling it.  If anyone knows the correct name of the shape, pass it along.  So, longer and a bit wider than the boule.  Place it on the floured peel dust the bread with flour and cover with plastic wrap.  I used the same wrap, just flipped it so the side with moisture was facing up.  This rose for another hour or so.  During this hour, I preheated the oven with baking stone to 450 F.

When it was ready to go, I made a slit down the center and slid it into the oven.  The dough was, I thought, a bit moister than the last one so I decided not to spray any water, this time.  I baked it at 450 for 15 minutes before turning it down to 350 for another 25 minutes.

Then it was done and I let it cool.

In summary, the crust is a bit thicker and crisper than Bread #1.  The texture of the bread is successfully less chewy, but as it turns out, it is not chewy enough, go figure.  The crumb is about the same as last time.

Also, as noted, the bread needs more salt.  It is very pretty looking for a loaf of bread.  Bread #3 coming soon…

Bread Yeast Starter #1

So I’ve tried this once before: mix equal parts flour and water, let it sit, and after a couple of days I had some bubbling.  As I kept feeding the starter, it got thicker, then started to dry out on top creating this leathery crust with a pinkish hue.  I tried removing it a couple of times, but couldn’t get all of it off so I  just started stirring it back in.  It smelled more perfume-y than sour and the resulting bread tasted decidedly reminiscent of grape nuts cereal.

I scrapped it.

It’s time to try it again.  With some adjustments of course…

1/2 cup Rye Flour (used to boost sour flavor)

1/2 cup Whole Wheat Four

1/2 cup All Purpose Flour

1/2 cup Bread Flour

2 1/2 cups warm-ish Water

Mix it all up (I did this in a large Pyrex container).

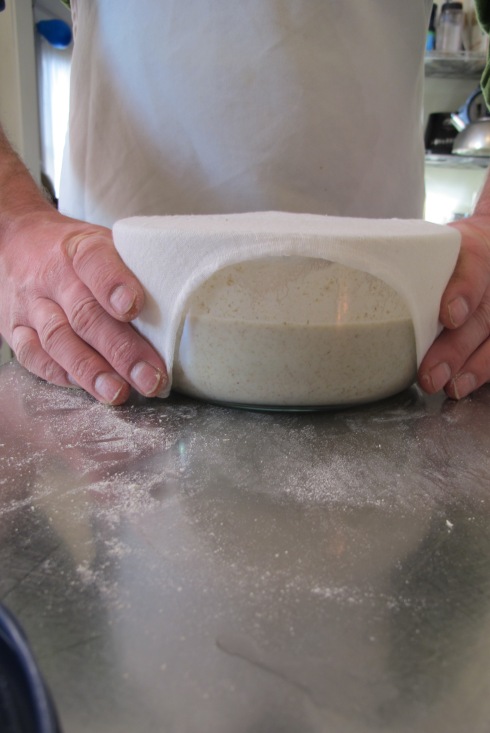
Then cover with a damp double layer of cheesecloth.  Stir it up a few more times over the next two days.  After 2-3 days you should see some bubbles breaking the surface or your starter may have separated with a dark liquid layer on top.  From what I have read on other blogs, books, etc. that is alcohol which is a byproduct of fermentation and a good sign that you have active yeast in the starter.

From this point you’ll want to feed your starter by stirring in 1-2 Tbs of flour at least once a day.  I have been removing a half cup of starter, stirring in a 1/2 cup of warm water, and then 1/2 cup of all purpose flour in the morning and then giving it another stir with a spoon full of flour in the evening.  I keep the starter covered after the first couple days to keep it from drying out.  However, if it looks like you are not getting the desired yeasty activity, leave the lid off for a few hours, then stir it up and put the lid back on.  Occasionally, adding a spoonful of Turbinado or other sugar will help keep a strong fermentation going or juice up a tired starter.  If the starter starts to thicken pass the “pancake batter” stage, add a little more room temperature water.

When you reach a sourness that you like, you can cover and refrigerate it.  That will slow down the lactobacillus growth and keep for a couple weeks or so.  Or just let ride.  As long as you are feeding it and pulling out some of the starter each week to make bread you should not have a real big difference in the flavor from the starter.  If you choose the leave-it-on-the-counter method, but do not make bread on a particular week, I would then discard 1 cup or so of starter and replenish with 1/2 cup of water and 1/2 cup flour.  f it ever starts to develop mold or smell really awful, just discard it and start over.

Okay now it is time to try it out.  Bread #2 is on its way…


Bread #1

Let’s start with bread.  So far our efforts have not awarded us the perfect loaf, however, we have not given up!  Continuing the quest: Attempt number 1 (for blog that is).

Bread #1

2.5 cups Bread Flour (355 g)

.5 cups Semolina Flour (91g)

2 tsp. Kosher Salt  (11g)

1.5 tsp. Active Dry Yeast – rehydrated with 4 tsp Warm Water

1 cup Water, room temperature

I stirred the yeast into the 4 tsp warm water and let it stand for about 10 minutes.

While the yeast was acclimating, I combined the flours and salt.  When the yeast was ready, I added the room temp water to it, stirred it around a bit, then added the flour and stirred until the spoon was no longer effective.

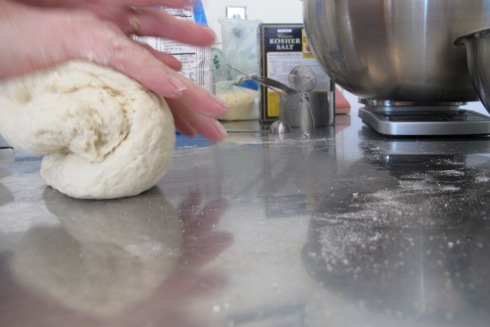
At which point, I turned the dough out onto a floured surface and kneaded until soft and smooth.  (Sprinkle on some more flour if the dough feels sticky.)

Cover with plastic wrap and let rise, in a bowl, until doubled in volume, which for me was only about an hour.  Then I punched it down and shaped it into a boule.

I placed the boule onto a floured wooden cutting board (makeshift peel) and let it rise again covered with the wrap for another 1.5 – 2 hours.  About an hour into this rise, I put the pizza stone into the oven and preheated it to 450F.  When the bread was ready, I scored the top with a sharp serrated knife and slid it onto the stone, sprayed the oven with a little water from a spray bottle popped in the bread and set the timer for 15 minutes.

I sprayed the oven another time after about 5 minutes.  A little poofing happened in the oven (oven spring, they call it) but not as much as I would have liked.  When the 15 mins were up, I turned the heat down to 375F for another 25 minutes.

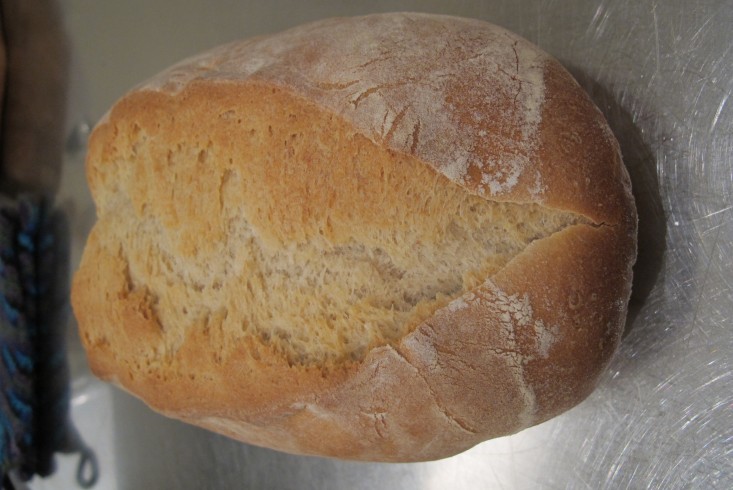
Then there was bread.

So the crust is a nice thin crisp crust which I am happy with.  The color is a  nice golden brown.  So far so good.  Cutting into it, the crumb is denser than I would like.

Now for the taste test…really nice depth of flavor, but the texture we decided is too chewy.

Next time, I’m going to try to keep the moisture level the same which I think should help keep the crust at the same level.  Cooking time and temp seemed to work okay for now, I’ll keep those the same (note that currently we are living and cooking at high altitude).  To soften the texture, I think we should replace some of the bread flour with all purpose flour and knead it a little less.  We’ll see how that goes.  Stay tuned…


The Gentle Kind

Trial & mirror

frugalfeeding

n. frugality; the quality of being economical with money or food.

Cold Glass

You can make these cocktails. Start right now.

Milkweed Farm

A coastal Maine farm that employs sustainable organic and biodynamic farming practices.

The Liquid Culture Project

Dedicated to a Culture of Better Drinking

Putney Farm

Get some good food. Cook it. Share with friends. Have a cocktail.

Boozed + Infused

Infusing liqueurs at home with inspiring and seasonal ingredients